Showing posts with label tutorial. Show all posts

Monday, October 13, 2014

Envelope Cover Tutorial

Hi all,

Sorry I have been absent for so long. I just popped in to add the Tutorial for the Envelope tablet cover to the Tutorial page.


If you go to the Tutorial Page and click on the picture it will open the tutorial as a PDF.

Please let me know if you have any problems. I would love to see pictures of your project too!

BTW - the cover is approximately 10" x 8" finished. So check the measurements of your tablet and adjust size to suit!

Bye for now, Jess

Wednesday, May 30, 2012

Envelope Ipad Cover Tutorial

Hi everyone!
Wow I can’t believe it has been over 10 days since we chatted!
This is what I have been working on….
P1020701
I made this Ipad Cover at the request of my friend Christine…This post is probably a bit of a spoiler because she hasn’t received it yet!
P1020699
I have written up a tutorial for anyone who might be interested.
The Envelope Ipad Cover Tutorial can be found here in PDF form!
(edited 13/7/12, I have removed to PDF from the net for a short time, sorry for any inconvenience!)
IMG_0329
As you can see it fits the Ipad perfectly! It has some padding for protection and I used the velcro so that there wouldn’t be anything hard or pointy rubbing against the Ipad.
This is my first tutorial done like this so if you have any problems or ideas on how to do it better please let me know!
blog signature

Tuesday, May 10, 2011

Easy Scarf Tutorial

Hi all,

I whipped up this little scarf and thought I would share with you how I did it. It is super easy! This is also my first tute so go easy on me!

img_3763

I made it light weight because it doesn’t get freezing cold for long in my part of the world, but this could easily be made warmer with some batting or some thicker fleece for the back. It would be lovely with some soft fluffy material on the back!

You will need –

img_3735
16 x 5” charm squares
Co-ordinating fabric for the back, I used ½ metre of 112cm wide soft corduroy from spotlight

Step 1. Lay your 16 squares out in a long strip, check placement for even colour spread. Sew together using ¼” seam.

img_3604

Step 2. Cutting your backing fabric. From the corduroy I cut 2 strips 5” wide x width of fabric, trimmed off the selvedge’s and joined them together. I left it longer until the next step.

img_3753

Step 3. Lay your backing fabric strip right side up with your pieced front right side down on top. I started at one end and pinned at each seam and then at the other end I trimmed the backing fabric to the same length.

img_3755

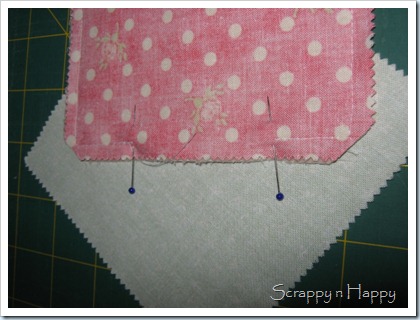
Step 4. Sew all the way around with a ¼” seam leaving a 2.5” gap in one end. Trim off the corners.
img_3756

Step 5. Turn right sides out and press lightly.

Step 6. Top stitch about 1/8” in from the edge all the way around the scarf.

img_3760

Yield – a one of a kind scarf that measures approximately 73” x 4.5”.

img_3764

This is so I don’t look like all the other school mums! LOL

blog signature